Using coloured gels in photography
Coloured gels can be used in a number of ways in photography. “Gels” are thin sheets of coloured plastic that go in front of light sources to change the colour. They are used with flash and continuous light sources. Make sure gels are secured firmly, and check they are not going to melt and burn if you use hot lights!
In this post I hope to demonstrate the following;
- Coloured gels can be used to change the colour of any object in an image. I guess this is obvious, but I want to draw attention to the fact you can change the colour of your subject, the background, or any other material elements in the image (for example smoke).
- Coloured gels can be used to make effects that are dramatic or extremely subtle.
- Coloured gels can be used to separate a subject from it’s background.
Using coloured gels to add drama in photo shoot
I have used some of these images (but in black and white versions, not colour) in a previous blog post. I always intended to write a post about using coloured gels, and these are good examples.
Adding a splash of colour
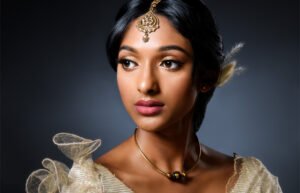
My model is Clarissa Holder. The key light in the next image was provided by a studio flash in a soft box, without a gel (ie it was white light).
I also added a light with a coloured gel from behind. This served two purposes. One was to show the shape of Clarissa’s head and separate her head from the background, and the other was the “artisti” decision to add colour.
Do not be confused by the colour of Clarissa’s translucent cap. It was in fact the colour it appears to be in this image. In fact I chose to use the specific coloured gels I did, specifically so they would be consistent with the colours of Clarissa’s clothes and props.

Coloured gels for more drama
I am not suggesting photographers use coloured gels all the time; they are just one of the tools in our arsenal.
If you look at the following image, you will see I have removed the white key light. Now the blue and magenta of the coloured gels dominate the images. Clarissa is illuminated by a blue light on the left, and a red light from the right (our left and right, as we look at the image). Both lights also shine on the background, which is a roll of black paper. It is worth noting that when you shine a blue light on brown skin, it appears reddish.


You can use gels to change the colour of smoke
If you want to add colour to your smoke, it is most efficient to backlight the smoke (ie put the light source on the far side of the smoke, and point it towards the camera).

Using coloured gels in a more subtle way
In the next portrait of Clarissa, I have added quite a subtle red fill light. It was a simple speedlight with a red gel. The effect is to subtly enrich the colour of Clarissa’s skin, making it more “exotic”. To make the effect less obvious, I removed the small red highlights in Clarissa’s eyes using Photoshop. I also desaturated the image a bit, because the colours were getting a little too vivid for my taste.
The colour balance on the camera was set to “flash”, and a white flash provided the key light to camera left. Another flash with a soft box provides a soft white light coming from behind the model (to the right as we look at her). This is the light that is responsible for highlighting the beautiful lines of Clarissa’s neck, jaw, collar bone and shoulder. This soft box was angled sp that it also cast light on the background.

Changing to a white background
The background cloth was removed for the next image, and the rear soft box was turned off. The wall is white, but it appears to be slightly coloured due to (a) a red speedlight acting as a fill light (it was located just behind the photographer’s right shoulder) and (b) a flash fitted with a blue gel shining on the wall from the camera left (and behind the model). In fact, if you look carefully you can see the shadow that Clarissa casts from the red fill light, because that area of the wall appears more blue than the rest of the wall. The wall was approximately 2m behind Clarissa’s back. I deliberately turned off the soft white rim lighting from behind Clarissa, because the wall is now pale and even in colour, so a nice dark shadow works very well to separate Clarissa from the background.
You can also see the red fill light reflecting off Clarissa’s “turban”, but once again I have used Photoshop to remove the red highlight in Clarissa’s eyes. You can see the redness on the whites of her eyes though.

Using coloured gels for rim lighting
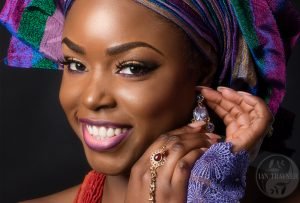
The first and final images in this series show examples of rim lighting helping to separate a subject from the background. The final image (below) shows the creative team (minus photographer). Note the red rimlight coming from the left of the image. It is providing quite a strong red colour, although only over very small visible areas. The rim light was provided by the same speedlight with a red coloured gel that I had used in the last image as a fill light. I just moved it from the front to the rear (I can’t remember if I adjusted the light intensity).
From left to right the team members are make up artist Donna Harris, model Clarissa Holder, and stylist Evelyn Tolu (aka Miss Goodliving).

The brighter a light source, the less effective a coloured gel will be
The brighter the light source, the less a gel changes the colour of the light. This may seem non-intuitive until you think about it. But when you think about it, it makes a lot of sense.
Translucent gels appear coloured because they selectively reduce the amount of light getting through at different wavelengths. For example a bue gel allows blue light through, but reduces the passage of other wavelengths, such as yellow and red. Gels that are more saturated will allow less light through. So if the light source is not very bright,the gel will block most of the non-blue light.
With a brighter light source, the blue light still gets through. But there isn’t enough dye to totally block the other wavelengths. So the brighter the light source, the more light of other wavelengths passes through the gel. This means the transmitted light starts to look more like white light.P
Probably the best way to get a feel for what happens is to do your own experiments. Sometimes it is quite fiddly getting the balance of colours you want. But like all photography, the more you practice, the better you will get at it.
The Beer-Lambert Law
If anyone wants to look it up, the Beer-Lambert law is the one that describes how light is absorbed when it passes through translucent materials. This law is usually used to describe how light is absorbed when it passes through a coloured solution, but the same principles apply when light is transmitted through a tranlucent gel. Here is another relatively simple description of the Beer-Lambert law.
Would you like to book your own photo shoot using coloured gels?
Follow this link if you are interested in booking a photo shoot.